
The Corsage Ambassador
As a self-appointed corsage ambassador, my motivation is to encourage florists to see themselves as artists and to give them the tools to make work that they love. My other motivation is to dazzle the public- to draw them in and make them curious about our work. This way, we show them that floristry is a rich, evocative artform like any other.
I encourage you to make what you crave to see!
I hope this little guide to corsages encourages you to join me in the work of elevating corsages and pushing floristry forward. You can jump ahead to the FAQs here.
Floral Design by Sue, Photo by Amanda Dumouchelle
How did I decide to appoint myself the ambassador of corsages?
I entered floristry with a surplus of passion and enthusiasm. I’ve always been a creative and curious person, but I was also most definitely a late bloomer ( pun intended ) who flitted from interest to interest for most of her life, never landing on a specific thing long enough to explore it deeply.
When I found floral design, it appealed to me instantly, probably because it offered a way to fuse many of my lifelong interests. It offered a way to express my reverence for nature, my love of fashion and accessory design, and my various crafty and artful leanings.
Finally, I’d found a way to take these somewhat disparate passion threads and weave them together. This realization energized me, and filled me with a sense of relief and joy. Joyful relief? Maybe that is what is at the heart of gratitude?
Anyway, in short, I’d finally found a medium that aligned with my personality, and I jumped in with both feet.

Floral Design by Sue, Photo by Amanda Dumouchelle
A soft spot for the art of wearable fashion
I was drawn to the small-scale handiwork aspect of floristry first. Perhaps because of my jewelry making hobby and love of fashion. I saw corsages, boutonnieres, crowns and other wearables as little works of art that would allow me to really express myself.
I loved them instantly; but was disappointed to find that many florists did not. They were seen as outdated, uncool, tacky, as or obligatory items to make as quickly as possible. They were made grudgingly, not out of love for our craft. To the florists I was exposed to, the most dreaded of the wearables, the most uncool, was the corsage.
To the florists I was exposed to, the most dreaded of the wearables, the most uncool, was the corsage.
As I gained experience, first working in a full service flower shop, then freelancing for event florists, and finally as the head of my own studio, I found myself eager ( and often assigned ) to make all the personal flowers. I loved to include unexpected, interesting ingredients, and I tried to make the wearable flowers look current and artful.

Floral Design by Sue, Photo by Amanda Dumouchelle
mastering the art of corsages
When I was starting out, corsages typically consisted of spray roses, some sort of waxy greenery, a mass of looped acetate ribbon, and some sort of uninspiring filler wired together and strapped to an elastic wristlet. The general recipe and concept had not really changed in 50 years.
I became obsessed with the challenge of updating and upleveling corsages, so the experiments began. I found myself spending an inordinate amount of time testing new ideas and sharing my findings in floristry forums. I was eager to offer thoughts on how to make corsages a little more cool, more current looking, and more pleasurable to make.
I was becoming a ( self-appointed ) corsage ambassador.
This title is a joke, of course. But do have a genuine love for the tradition of wearing flowers. People all over the world have adorned themselves with flowers since time began and these traditions remain strong in many parts of the world. Think of Indian jai mala, or Hawaiian lei. Even though the tradition of corsages became popularized in Europe long ago, it appears that currently they are mostly an American custom.
The tradition of wearing corsages could potentially fizzle if we florists decide they aren’t worthy of saving. So I continue to advocate for corsages.
It’s my hope that this little guide contributes to keeping this tradition alive.
✨If you have a disdain for corsages, this guide is for you.
✨If you keep reaching for the same uninspiring materials, this is for you!
✨If you are waking up early to make corsages the morning of an event because you fear they won’t last, this is for you!
✨If you love corsages, but just want a few helpful tips and resources, this guide is also for you.
I hope this helps solve issues and gets you closer to loving corsages as much as I do!
Floral Design by Sue, Photo by Amanda Dumouchelle
Frequently Asked Questions
-
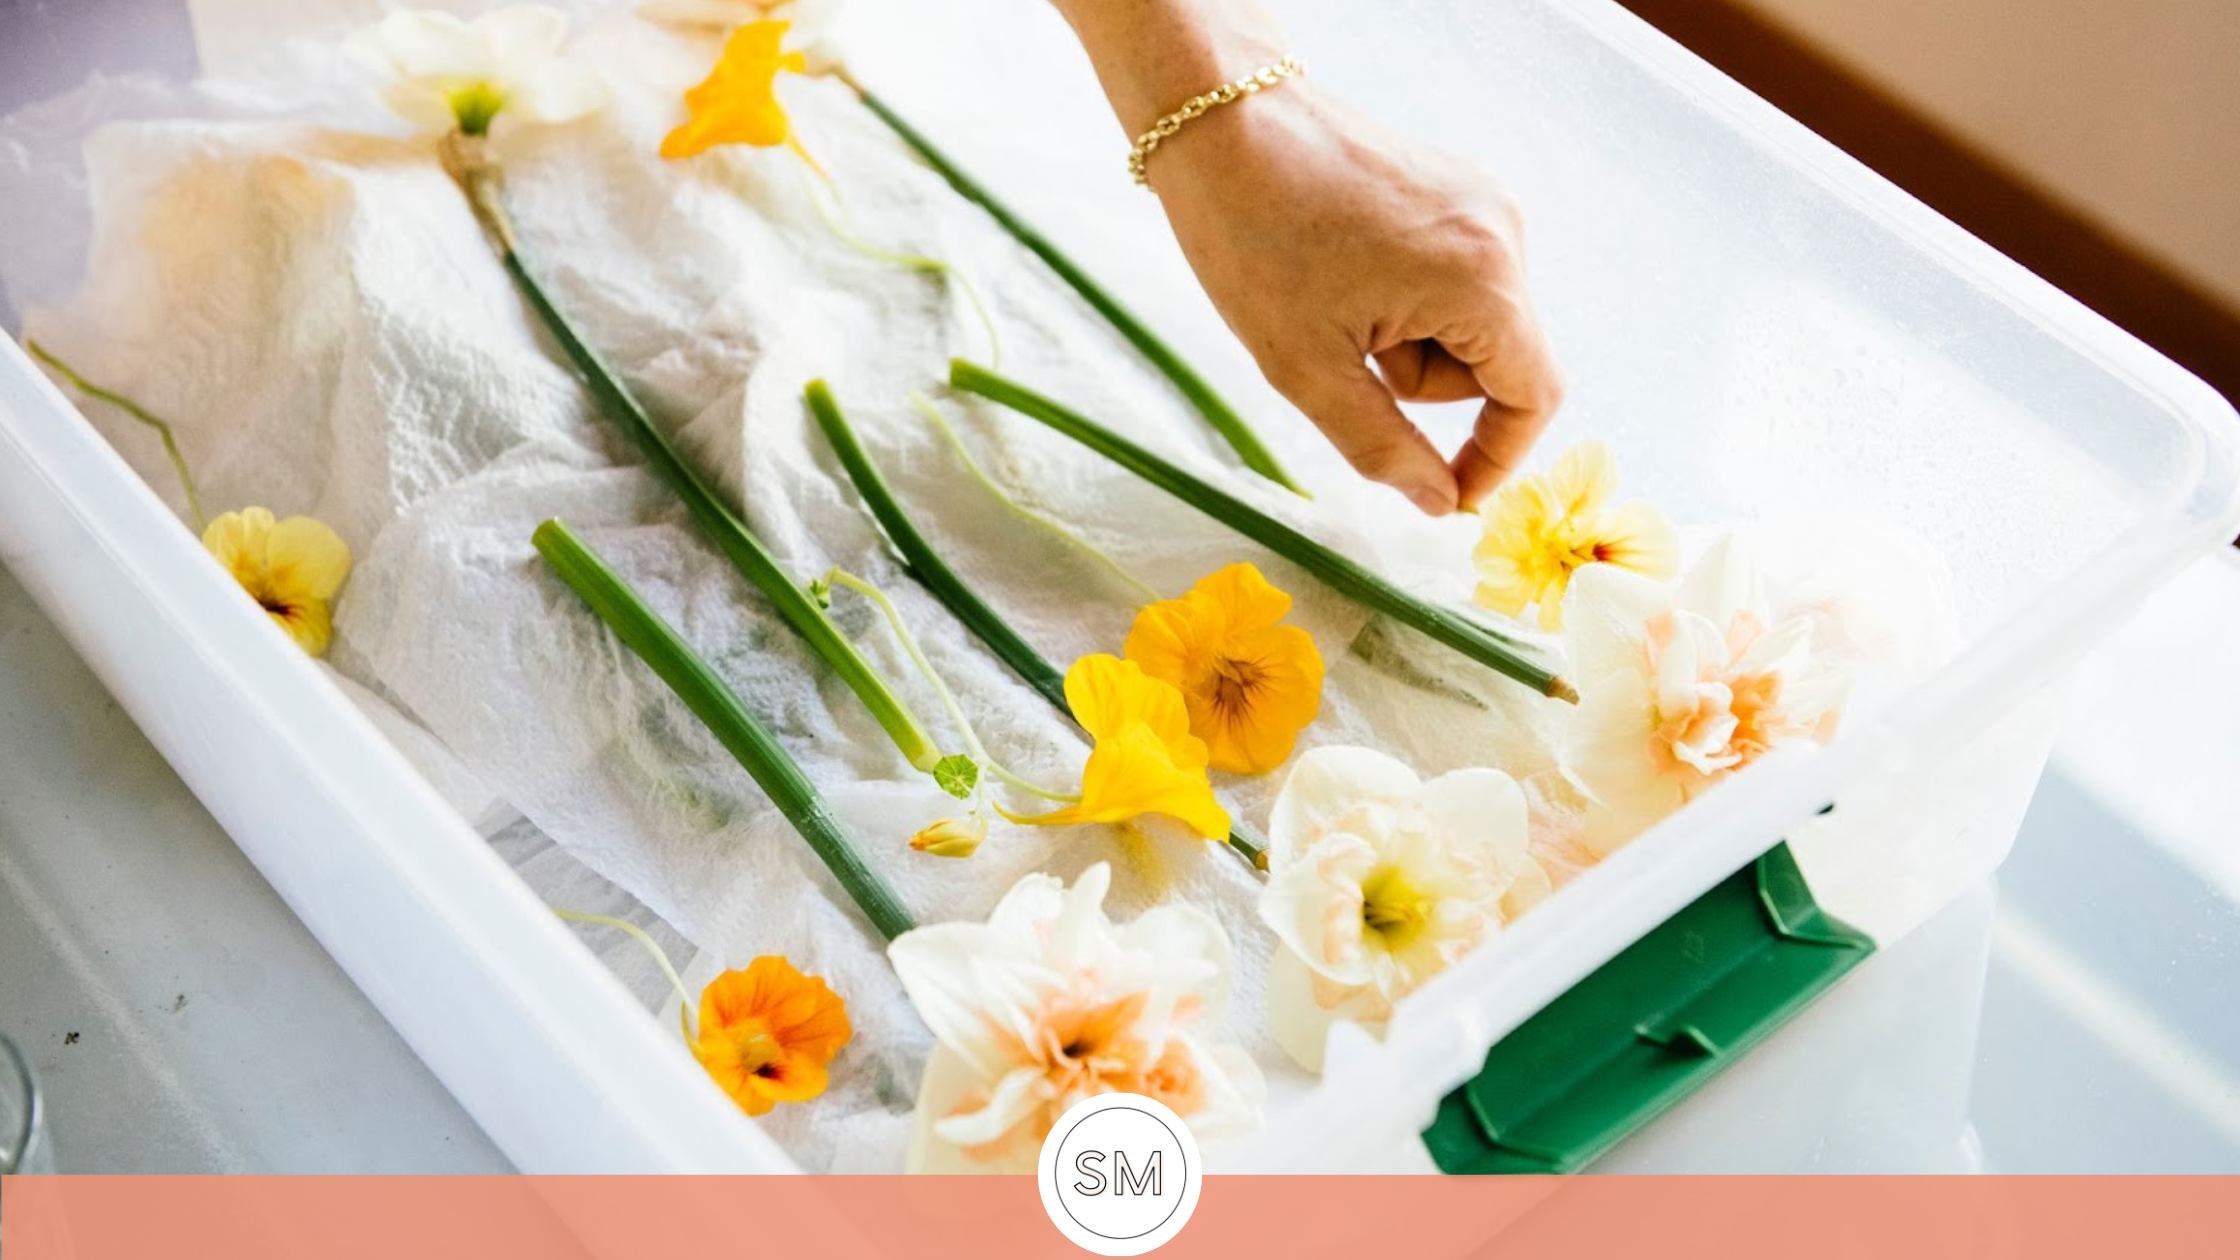
It may seem counterintuitive, but it is best to make corsages ( and all wearables ) 1-2 days before their event. I hear many new florists say that they make their corsages right before ( often the morning of!! ) an event to ensure freshness throughout the day, but the opposite is really much more effective. If you make your corsages ahead, and boost them in the hydration chamber, they will have a much better chance of staying hydrated during wear. Taught to me by master florists Hitomi Gilliam and Gregor Lersch, the hydration chamber is simply any airtight container lined with damp paper towel ( or lightweight packing paper). Place your finished wearables inside, spray them with water, cover with more damp paper towel, spray again, and store in a cool, dark place ( ideally a floral cooler ) for 24-48 hours. I am not equipped to explain this process with scientific precision, but essentially, a pressure shift occurs within then airtight container, forcing the water vapor inside into the stomata ( tiny pores ) on the surface of the petals, stems, and leaves of the materials, boosting them with hydration from the outside in. Stomata are incredibly clever little structures, opening when humidity is optimal and closing when conditions are hot or dry. Knowing this, we create simple, manmade optimal environments- hydration chambers! Plants conditioned this way emerge fully hydrated- much more thoroughly than hydration from stem uptake only. I’ve tested this extensively over the years, and have found that most materials are amenable to this conditioning process. It has allowed me to design with a wide range of materials, ( more on this below ) resulting in more freedom in my work and much more interesting, inspiring creations. It has truly transformed how I view plant material!
-
When I was a new florist, my go-to material list for wearables was very brief. Spray roses, orchids, leathery foliages, waxy fillers- the usual suspects. As I began to explore the floral world, I started to find evidence of florists working with unusual, unexpected, inspiring materials. The one that stood out to me the most was Françoise Weeks. Her work gave me the courage to step out and experiment with new things. She inspired me to be curious and to test, test, test. With her as an inspiration, I began to test every material I came across. Each new flower that passed through my hands was documented. In the beginning, the process was very simple- snip a few stems, leave them on my workbench, and record how long they lasted. Now, after considering the value of proper conditioning and the boosting ability of the hydration chamber, my tests include 3 steps:
1. Bring flowers to the studio. Snip, place in buckets of water and allow them to hydrate through their stems for several hours, preferably overnight.
2.. Snip several stems and pop into the hydration chamber for 24-48 hours ( just depending on my level of busyness ) .
3. Remove from the chamber and document how long they perform at room temperature.
Over the years, these tests have allowed me to amass a long list of “reliables.” These are materials that I can recommend comfortably, as I have tested them many times.
I’ll add that anti-transpirant sprays such as Finishing Touch or Crowning Glory can be applied as a final step. These sprays ( seemingly silicone based ) seal the stomata of the plant material ( the microscopic pores found on the epidermis on the petals, stems, and leaves ) and lock in moisture, thus prolonging longevity. I attempt to be as sustainable as possible and try to limit the amount of plastics I use, so I rarely reach for these sprays. That said, I am lucky to live in a relatively cool, humid climate. For those who live and work in hot, arid climates, these sprays can be used to great effect when necessary- say when designing wearable pieces for a long outdoor photo shoot or desert wedding. In my tests, they have doubled the performance time of plant materials. -
The number one question I receive when I post a wearable online is: “how long will this last”? I bristle a bit at this question because I think when we focus on longevity as intimately connected to the intrinsic value of flowers, we reduce them to a somewhat soulless product. Most flowers are short lived, and because of this, they have much to teach us about relishing the present moment. Wearables, corsages included, are not meant to last a long time! They are meant to celebrate an event- a dance, a wedding, a holiday, a ceremony, a photo shoot- they should not be expected to last beyond that. When we accept this idea, we no longer have to be compelled to reach for the usual suspects. Yes, the use of sturdy, reliable flowers will increase the longevity and durability of these pieces, but I encourage you to think beyond tight spray roses and fern. Working with interesting materials helps us stay inspired! I use lily of the valley, pansies, hosta blooms, muscari, passionflower, and lilac, etc in my wearables…all of the most fleeting, fragrant, evocative blooms. I do this because they are emotive, sentimental, and beautiful. At the same time, I make sure to hydrate them well in the hydration chamber and I am transparent with clients about their longevity. For instance, if I make a lily of the valley boutonniere for a wedding, I’ll make one for the wedding ceremony and one to wear to the reception. With client expectations in check, there is nothing to fear. I think it’s important to create with the fleeting and unexpected- this is how we inject our work with emotion, draw the public in and make them curious about what we do. This is how we show people that we are artists. With this approach, we can keep the tradition of wearing flowers vibrant and alive.
-
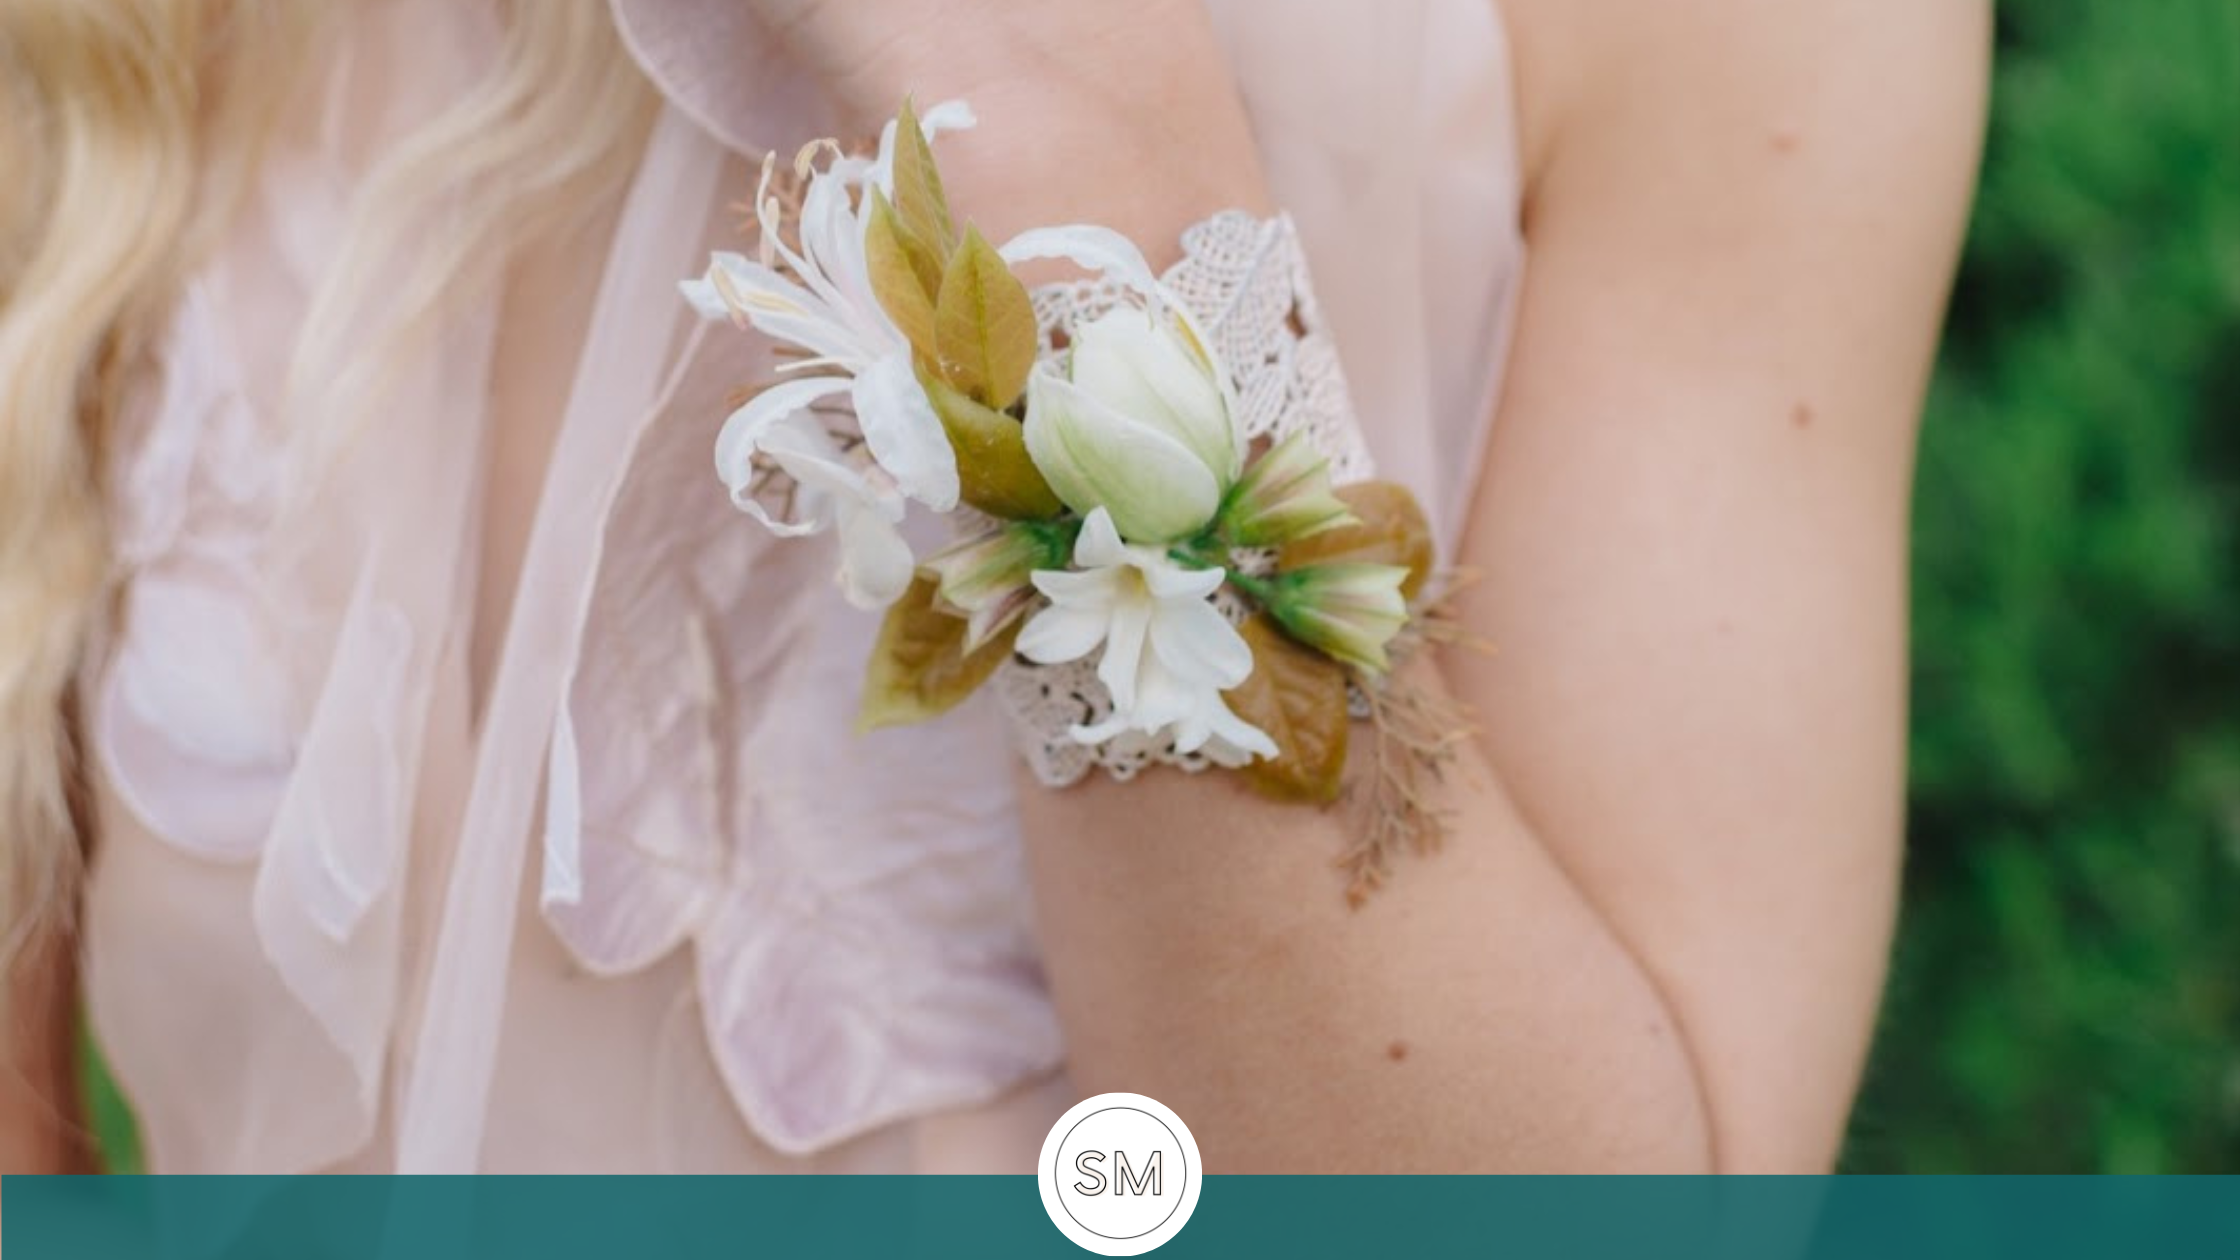
When I started out as a florist, “wiring and taping” was the prevailing corsage making method. I am grateful that I learned this way, as I can wire and tape nearly every type of botanical material quickly and comfortably. I love the control and manipulation options that wiring provides. It allows me to maximize materials and create without limits. I can make weak stems strong, make use of broken flower heads, deconstruct and imaginatively reconstruct flowers, and turn a single raceme flower spikes such as hyacinth into a handful of expressive, individually wired jewels. I encourage all florists to learn the wiring techniques appropriate for each type of flower as this knowledge can really aid in actualizing the amazing ideas that pop into one’s head! At the same time, I also adore floral glue. Oasis floral adhesive is my go-to, as it is incredibly strong, sets quickly, and will not separate or fail when placed in the hydration chamber or floral cooler. It takes some patience and practice, but once you “make friends” with floral glue, you will see that it is an indispensable floristry tool. In my opinion, when it comes to corsages, the glued method wins everytime. For shoulder corsages or “pinned” corsages, the wire and tape method can be too bulky or heavy for the often lightweight materials these are placed on. Instead, I cut a platform out of waterproof fabric, and use floral glue to create a low-profile, modern looking floral composition. These delicate, feather-light designs are then attached to the garment with corsage magnets or even corsage pins. These pieces are more comfortable to wear and won't damage gauzy or delicate fabrics.
For wrist corsages, I prefer the glued method as well. Before I was a florist, I made jewelry as a hobby. When I fell in love with floral wearables, I revisited my jewelry making kit and began to experiment combining flowers with jewelry bases. For many years, the “cuff corsage” or floral bracelet has been my most popular, most asked about wrist corsage design. I prefer sleek, simple, current looking bases, and recommend sourcing these from jewelry supply stores instead of floral accessory outlets. These unadorned jewelry platforms or “blanks” are offered in all sorts of shapes and sizes. They are often made of brass, but one can find options in aluminum, wood, plastic, or leather. For metal cuffs, one must create a glue-ready platform on the piece before attaching flowers. Floral adhesive is incredibly strong, but requires a surface that is a bit porous or textured to adhere securely. I achieve this by gluing down a very fine layer of dried moss, or by applying a strip of waterproof tape to the design area of the blank.
I hope you enjoyed this little guide
I hope it encourages you to join me in the work of elevating corsages and pushing floristry forward. Please take advantage of the resources here, and I’d love to answer all of your corsage queries in the comment section below!
make what you crave to see!
As a self-appointed corsage ambassador, my motivation is to encourage florists to see themselves as artists and to give them the tools to make work that they love. My other motivation is to dazzle the public- to draw them in and make them curious about our work. This way, we show them that floristry is a rich, evocative artform like any other. I encourage you to make what you crave to see!
Follow me on Instagram for mini tutorials or dive in with my special corsage series of online tutorials to learn steep by step from me, or purchase my book, The Art of Wearable Flowers for even more detailed information and ways to combine techniques to make all manner of creative corsages, floral tattoos, floral jewelry, headpieces, and more!
With love,

Ready to go further?
For more opportunities to learn and grow alongside other floral artists, join us in The Virtual Studio or check out my extensive library of self-paced online classes.
